


Hey there! As a supplier of LED porch wall lights, I often get asked about how to mount these lights on a brick wall. It might seem a bit daunting at first, but with the right tools and a bit of know - how, it's a task that you can totally handle on your own. In this blog, I'll walk you through the whole process step by step.
Step 1: Gather Your Tools and Materials
First things first, you need to make sure you have all the necessary tools and materials. Here's a list of what you'll need:
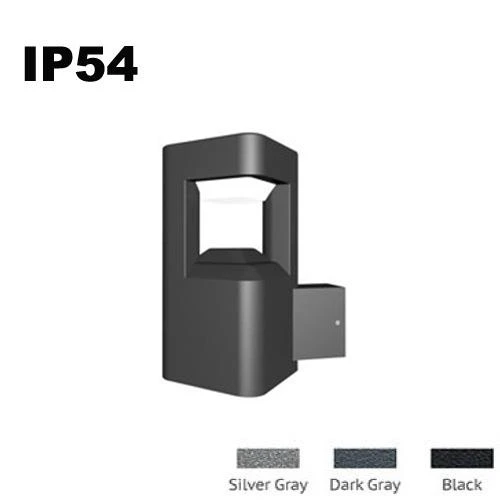
- Your LED porch wall light. We offer a variety of options, like the Porch Light with Motion Sensor, the Rectangular LED Short Wall Light IP54, and the Porch Light For Garden Wall.
- A drill with masonry bits. You'll need these to make holes in the brick wall.
- Wall plugs. These are essential for securing the light fixture to the wall.
- Screwdrivers (both flat - head and Phillips - head, depending on the type of screws your light uses).
- A level. This will help you ensure that your light is mounted straight.
- A measuring tape. You'll use this to mark the correct placement for your light.
- Safety goggles and gloves. Safety should always come first when you're doing any kind of DIY project.
Step 2: Choose the Right Location
Picking the right spot for your LED porch wall light is crucial. You want to make sure it provides enough light for the area you want to illuminate, like your porch or garden entrance. Here are some tips:
- Consider the height. A good rule of thumb is to mount the light at eye - level or slightly above, usually around 6 to 7 feet from the ground.
- Think about the direction of the light. You might want the light to shine downwards to avoid glare or upwards for a more ambient effect.
- Make sure there are no obstacles in the way, like pipes or wires.
Once you've decided on the location, use your measuring tape to mark the spots where you'll drill the holes. Use the level to ensure that your marks are straight and even.
Step 3: Turn Off the Power
Before you start drilling or doing any electrical work, it's super important to turn off the power to the area where you'll be installing the light. Locate your circuit breaker box and find the switch that controls the power to your porch or the area where you're mounting the light. Flip the switch to the "off" position. You can double - check that the power is off by using a voltage tester.

Step 4: Drill the Holes
Now it's time to drill the holes in the brick wall. Put on your safety goggles and gloves. Insert the appropriate masonry bit into your drill. Start drilling at the marked spots. Go slowly at first to avoid cracking the brick. Apply steady pressure and let the drill do the work. Once you've drilled the holes, use a brush or a vacuum to clean out any dust or debris from the holes.
Step 5: Insert the Wall Plugs
Take your wall plugs and insert them into the drilled holes. You might need to use a hammer to gently tap them in until they're flush with the wall. Make sure they're firmly in place, as they'll be holding the weight of the light fixture.
Step 6: Mount the Light Fixture
Carefully hold your LED porch wall light up against the wall at the marked location. Line up the holes in the light fixture with the wall plugs. Insert the screws through the holes in the light fixture and into the wall plugs. Use your screwdriver to tighten the screws, but don't over - tighten them, as this could damage the light or the wall.
Step 7: Connect the Wires
Now comes the electrical part. Most LED porch wall lights come with pre - wired cables. You'll need to connect these cables to the existing electrical wiring in your wall. Usually, there are three wires: black (hot), white (neutral), and green or bare copper (ground).
- Connect the black wire from the light fixture to the black wire in the wall. You can use wire nuts to secure the connection.
- Connect the white wire from the light fixture to the white wire in the wall, again using wire nuts.
- Connect the green or bare copper wire from the light fixture to the grounding wire in the wall.
Make sure all the wire connections are tight and secure. Wrap the wire connections with electrical tape for added safety.
Step 8: Test the Light
Once you've connected the wires, it's time to test the light. Go back to your circuit breaker box and turn the power back on. Flip the switch for the porch light. If the light comes on, great! You've successfully installed your LED porch wall light on the brick wall. If the light doesn't come on, double - check your wire connections and make sure the power is on.
Step 9: Final Touches
After you've tested the light and everything is working fine, you can make any final adjustments. Use your level to make sure the light is still straight. Tighten any loose screws if necessary.
And that's it! You've now mounted your LED porch wall light on a brick wall. It's a great way to enhance the look and safety of your home.
If you're interested in purchasing high - quality LED porch wall lights, we've got a wide range of products to choose from. Whether you need a Porch Light with Motion Sensor for added security, a Rectangular LED Short Wall Light IP54 for a modern look, or a Porch Light For Garden Wall to light up your garden, we've got you covered.
If you have any questions or want to discuss your specific requirements for LED porch wall lights, feel free to reach out to us. We're always happy to help you with your lighting needs and guide you through the selection process.
References
- Home Depot DIY Guides
- Lowe's Lighting Installation Manuals


