


Adding outdoor wall lighting to an existing electrical system can significantly enhance the functionality and aesthetics of your outdoor space. As a trusted Outdoor Wall Lighting supplier, I understand the importance of proper installation and the right choice of lighting fixtures. In this blog post, I'll guide you through the process of adding outdoor wall lighting to your existing electrical setup, from planning to installation.
Planning Your Outdoor Wall Lighting
Before you start the installation process, it's crucial to have a clear plan in place. This involves determining the purpose of the lighting, choosing the right fixtures, and assessing your existing electrical system.
Determine the Purpose of the Lighting
Outdoor wall lighting can serve multiple purposes, such as providing security, illuminating pathways, or enhancing the ambiance of your outdoor space. Consider the areas you want to light up and the specific functions you want the lighting to perform. For example, if you want to improve security, you might choose bright, motion-activated lights. If you're looking to create a cozy atmosphere, softer, decorative lights would be more appropriate.
Choose the Right Fixtures
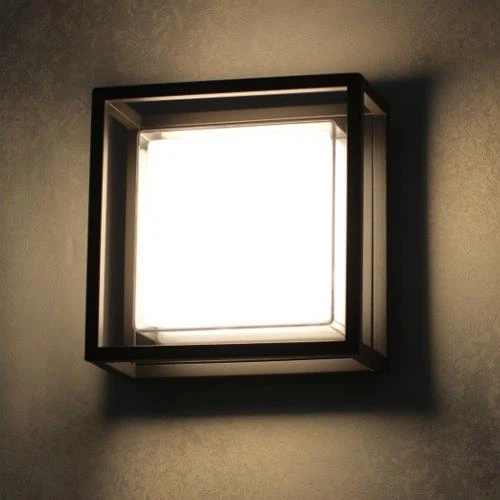
Once you've determined the purpose of the lighting, it's time to choose the right fixtures. There are various types of outdoor wall lighting available, including wall sconces, floodlights, and lanterns. When selecting fixtures, consider factors such as the style of your home, the amount of light needed, and the durability of the fixtures. At our Outdoor Wall Lighting collection, we offer a wide range of high-quality fixtures to suit different needs and preferences. For instance, our 12W Outdoor LED Wall Lamp is a great choice for providing bright, energy-efficient illumination, while our LED Surface Mounted Wall Light With Grille adds a touch of elegance to any outdoor space.
Assess Your Existing Electrical System
Before you can add new outdoor wall lighting, you need to assess your existing electrical system to ensure it can handle the additional load. Check the capacity of your electrical panel and the wiring in the area where you plan to install the lights. If your electrical system is outdated or overloaded, you may need to upgrade it before proceeding with the installation. It's also important to ensure that the wiring is properly grounded to prevent electrical hazards.
Preparing for Installation
Once you have a plan in place, it's time to prepare for the installation process. This involves gathering the necessary tools and materials, turning off the power, and marking the installation locations.
Gather the Necessary Tools and Materials
To install outdoor wall lighting, you'll need a few basic tools and materials, including a drill, screwdriver, wire strippers, electrical tape, and a voltage tester. You'll also need the lighting fixtures, mounting brackets, and wiring. Make sure you have all the necessary tools and materials on hand before you start the installation.
Turn Off the Power
Before you begin working on the electrical system, it's essential to turn off the power to the area where you'll be installing the lights. Locate the circuit breaker that controls the power to the outdoor area and switch it off. Use a voltage tester to verify that the power is off before proceeding.
Mark the Installation Locations
Use a pencil or chalk to mark the locations where you'll be installing the lighting fixtures. Make sure the marks are level and evenly spaced. You may also want to use a level to ensure that the fixtures are installed straight.

Installing the Lighting Fixtures
Once you've prepared for the installation, it's time to install the lighting fixtures. This involves mounting the fixtures, connecting the wiring, and testing the lights.
Mount the Fixtures
Use a drill to make holes in the wall at the marked locations. Insert the mounting brackets into the holes and secure them with screws. Place the lighting fixtures onto the mounting brackets and secure them with screws. Make sure the fixtures are firmly attached to the wall.
Connect the Wiring
Carefully connect the wiring from the lighting fixtures to the existing electrical system. Use wire strippers to remove the insulation from the ends of the wires. Connect the black (hot) wire from the fixture to the black (hot) wire in the electrical box. Connect the white (neutral) wire from the fixture to the white (neutral) wire in the electrical box. Connect the green or bare copper (ground) wire from the fixture to the ground wire in the electrical box. Use electrical tape to secure the connections and prevent them from coming loose.
Test the Lights
Once you've connected the wiring, turn the power back on at the circuit breaker. Use a voltage tester to verify that the power is on and that the lights are receiving electricity. If the lights don't turn on, check the connections and make sure the wiring is properly installed. If you're still having trouble, consult a licensed electrician.
Finishing Touches
After you've installed the lighting fixtures and tested the lights, it's time to add the finishing touches. This involves adjusting the angle of the lights, installing any additional accessories, and cleaning up the installation area.
Adjust the Angle of the Lights
Once the lights are installed, you may need to adjust the angle of the fixtures to ensure that the light is directed where you want it. Use a screwdriver to loosen the screws on the mounting brackets and adjust the angle of the fixtures. Tighten the screws to secure the fixtures in place.
Install Any Additional Accessories
Depending on the type of lighting fixtures you've installed, you may need to install additional accessories, such as bulbs, shades, or guards. Follow the manufacturer's instructions to install the accessories properly.
Clean Up the Installation Area
Once you've completed the installation, clean up the installation area. Remove any debris or tools from the area and dispose of them properly. Make sure the area is clean and safe.
Conclusion
Adding outdoor wall lighting to an existing electrical system is a great way to enhance the functionality and aesthetics of your outdoor space. By following the steps outlined in this blog post, you can install outdoor wall lighting safely and effectively. Remember to plan your lighting carefully, choose the right fixtures, and assess your existing electrical system before proceeding with the installation. If you have any questions or need further assistance, don't hesitate to contact us. We're here to help you find the perfect outdoor wall lighting solutions for your home.
If you're interested in purchasing high-quality outdoor wall lighting fixtures, please feel free to browse our Outdoor Wall Lighting collection. We offer a wide range of fixtures to suit different needs and preferences, and our team of experts is always available to assist you with your selection. Contact us today to start the procurement process and transform your outdoor space with beautiful, functional lighting.
References
- Electrical Safety Foundation International. (n.d.). Outdoor Electrical Safety. Retrieved from https://www.electricalsafetyfoundation.org/safety-topics/outdoor-electrical-safety/
- Home Depot. (n.d.). How to Install Outdoor Wall Lighting. Retrieved from https://www.homedepot.com/c/ah/how-to-install-outdoor-wall-lighting/9ba683603be9fa5395fab90d8d69191
- Lowe's. (n.d.). Outdoor Wall Lighting Installation Guide. Retrieved from https://www.lowes.com/n/how-to/outdoor-wall-lighting-installation-guide


