


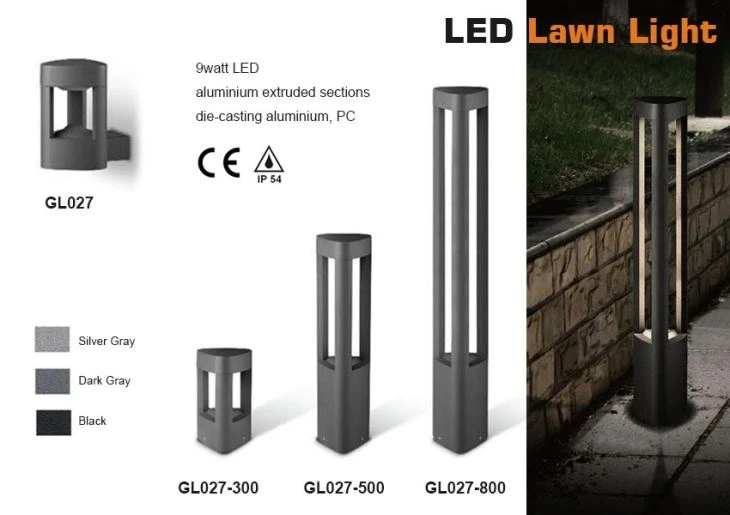
As a supplier of LED Garden Light IP54, ensuring that our products work properly is of utmost importance. IP54-rated LED garden lights are designed to be dust - protected and splash - proof, making them suitable for outdoor use. Here, I'll guide you through the steps to check if these lights are functioning as they should.
Pre - Inspection Checks
Before diving into the actual functionality test, a few pre - inspection steps are necessary. First, examine the physical condition of the light fixture. Check for any visible signs of damage such as cracks, dents, or loose parts. Since these lights are installed outdoors, they are exposed to various environmental elements, which may cause physical harm over time. A damaged fixture can not only affect the light's performance but also pose a safety risk.
Next, inspect the wiring. Look for any frayed wires, loose connections, or signs of corrosion. Faulty wiring is a common cause of malfunction in LED lights. Make sure all the wires are securely connected to the power source and the light fixture itself. If you notice any issues with the wiring, it's best to replace the damaged parts or have a professional electrician handle the repair.
Power Supply Check
The first step in checking if the IP54 LED garden lights are working is to ensure that they are receiving power. Plug in the light or check the connection to the power source. If the lights are connected to a solar panel, make sure the panel is properly installed and exposed to sufficient sunlight. Solar - powered IP54 LED garden lights rely on sunlight to charge their batteries, so a lack of sunlight can lead to insufficient power.
You can use a voltage tester to check if the power supply is providing the correct voltage. Most IP54 LED garden lights operate at a specific voltage range, usually around 12V or 24V. If the voltage is too low or too high, it can cause the lights to flicker, dim, or not work at all. If the voltage is incorrect, check the power source, such as the transformer or the battery, and make any necessary adjustments.
Light Output Test
Once you've confirmed that the lights are receiving power, it's time to test the light output. Turn on the lights and observe their brightness. The light should be bright and evenly distributed. If the light is dim, it could be due to several factors. One possibility is a dirty lens. Over time, dust and dirt can accumulate on the lens, reducing the amount of light that passes through. You can clean the lens with a soft, dry cloth to see if it improves the brightness.
Another reason for dim lights could be a problem with the LED chips. LED chips can degrade over time, especially if they are exposed to high temperatures or voltage fluctuations. If you suspect that the LED chips are faulty, you may need to replace them. However, this can be a complex task, so it's advisable to contact a professional if you're not experienced in handling LED components.
Check for any flickering or strobing of the lights. Flickering can be caused by a loose connection, a faulty driver, or interference from other electrical devices. If the lights flicker, try tightening the connections and see if the problem persists. If it does, the driver may need to be replaced. The driver is responsible for regulating the power supply to the LED chips, and a malfunctioning driver can cause inconsistent light output.
Waterproof and Dust - Proof Check
Since IP54 LED garden lights are designed to be dust - protected and splash - proof, it's essential to check their waterproof and dust - proof capabilities. Look for any signs of water or dust inside the light fixture. If you notice moisture or dust, it could indicate a problem with the IP rating. The IP54 rating means that the light is protected against dust ingress to a degree that it will not interfere with the normal operation of the device, and it can withstand water splashing from any direction without harmful effects.
To test the waterproofing, you can use a gentle spray of water on the light fixture. Make sure the water is not too forceful, as this could damage the light if it's not designed to withstand high - pressure water. After spraying the water, wait for a few minutes and then check inside the fixture for any signs of water. If water has entered, the light may have a faulty seal, and you may need to replace the gasket or the entire fixture.
Color Temperature and Color Rendering Index (CRI) Check
The color temperature and CRI of the IP54 LED garden lights can also affect their performance. The color temperature is measured in Kelvin (K) and determines the color of the light. A lower color temperature (around 2700K - 3000K) produces a warm, yellowish light, while a higher color temperature (around 5000K - 6500K) produces a cool, bluish - white light.
To check the color temperature, compare the light output of the IP54 LED garden lights with a known reference light source. You can also use a color temperature meter if you have one. If the color temperature is significantly different from the specified value, it could indicate a problem with the LED chips or the driver.

The CRI measures how accurately the light source renders colors compared to natural light. A higher CRI (80 or above) means that the colors will appear more vibrant and true - to - life. To check the CRI, place a variety of colored objects under the light and observe how the colors look. If the colors appear dull or distorted, the CRI may be lower than expected.
Additional Checks for Specific Types of IP54 LED Garden Lights
If you're dealing with LED Outdoor Wall Light, make sure they are properly mounted on the wall. Check the mounting brackets for any signs of looseness or damage. A loose mount can cause the light to sway or fall, which is a safety hazard. Also, ensure that the light is aimed in the right direction to provide the desired illumination.
For Curve Light Wall Installed 9watt, pay attention to the curvature of the light. The curve should be smooth and without any kinks or bends that could affect the light distribution. Check the wiring inside the curved fixture to make sure it's not pinched or damaged.
When it comes to Address Number LED Wall Light, verify that the address numbers are clearly visible and well - lit. Check for any burnt - out LEDs in the number display. If an LED is not working, it may need to be replaced to ensure that the address is easily readable at night.
Conclusion
Checking if IP54 LED garden lights are working properly involves a series of comprehensive steps. By following these steps, you can identify and resolve any issues with the lights, ensuring that they provide reliable and efficient illumination for your garden. If you encounter any problems that you're unable to solve on your own, don't hesitate to contact us. As a professional supplier of IP54 LED garden lights, we have the expertise and resources to assist you. Whether you need advice on installation, troubleshooting, or are interested in purchasing our products, we're here to help. Feel free to reach out to us for procurement and further discussions.
References
- "LED Lighting Handbook" by LED Lighting Association
- "Outdoor Lighting Design and Installation Guide" by International Dark - Sky Association


